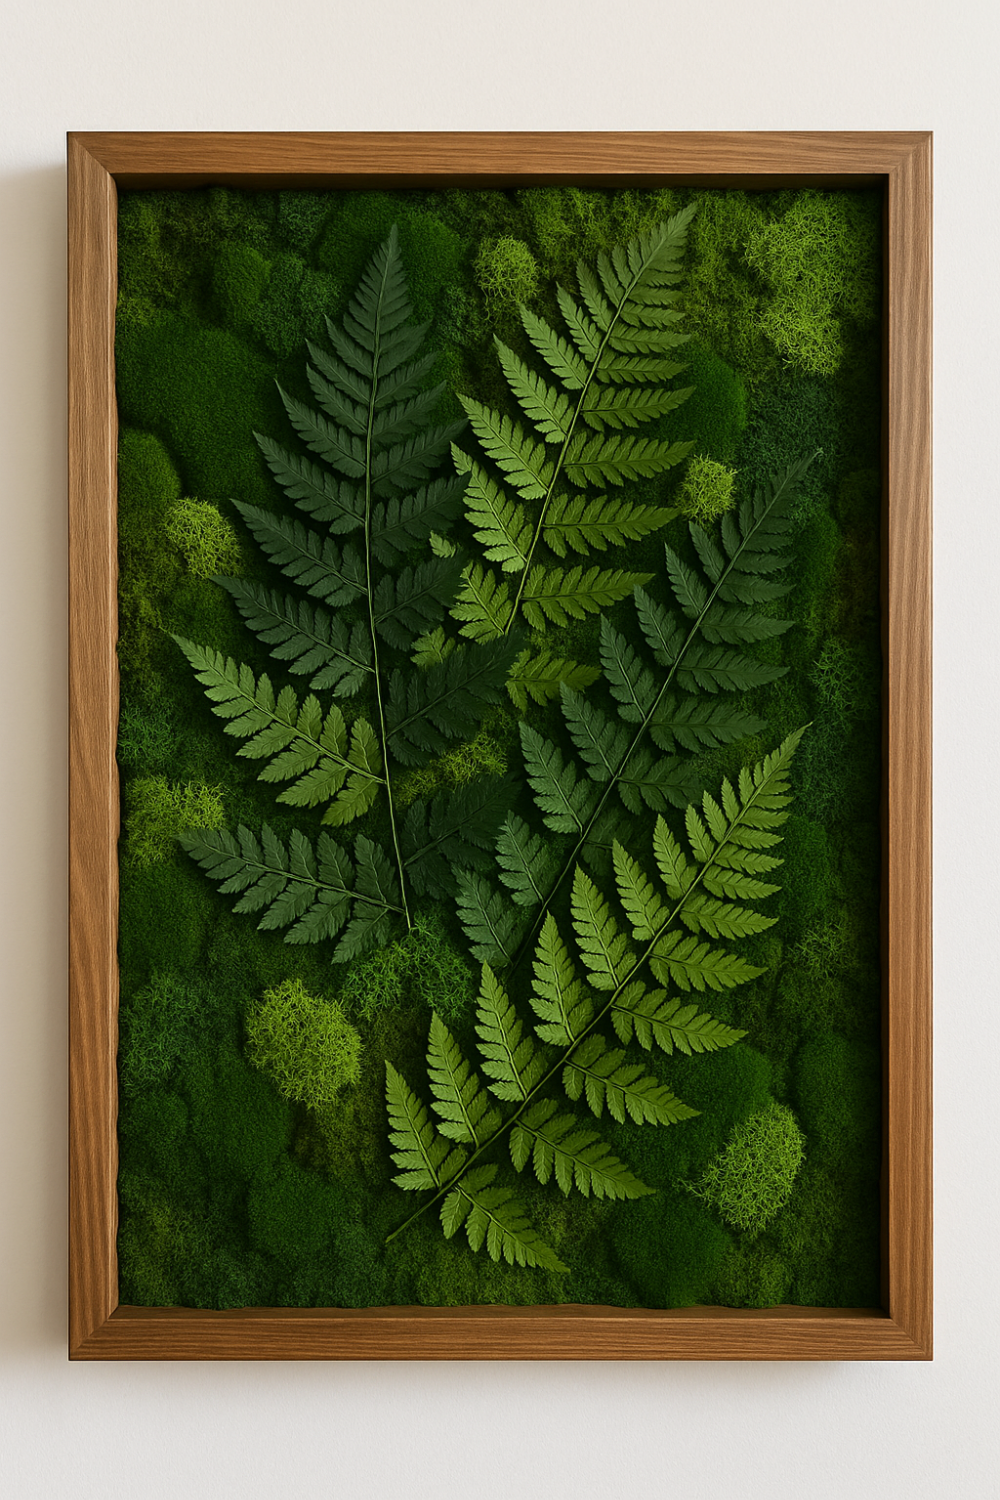
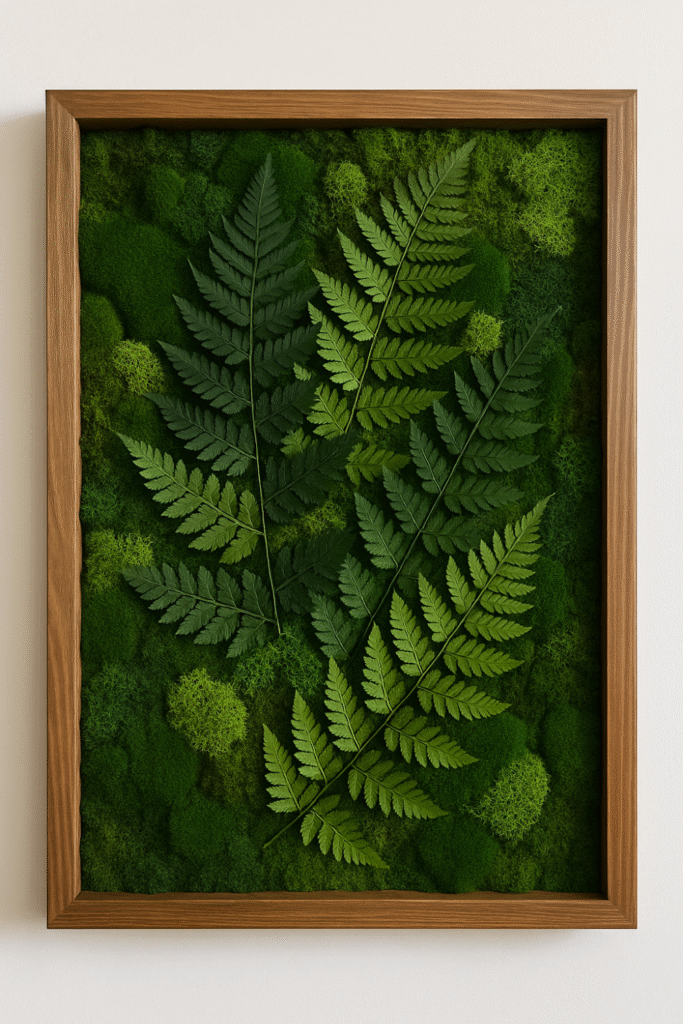
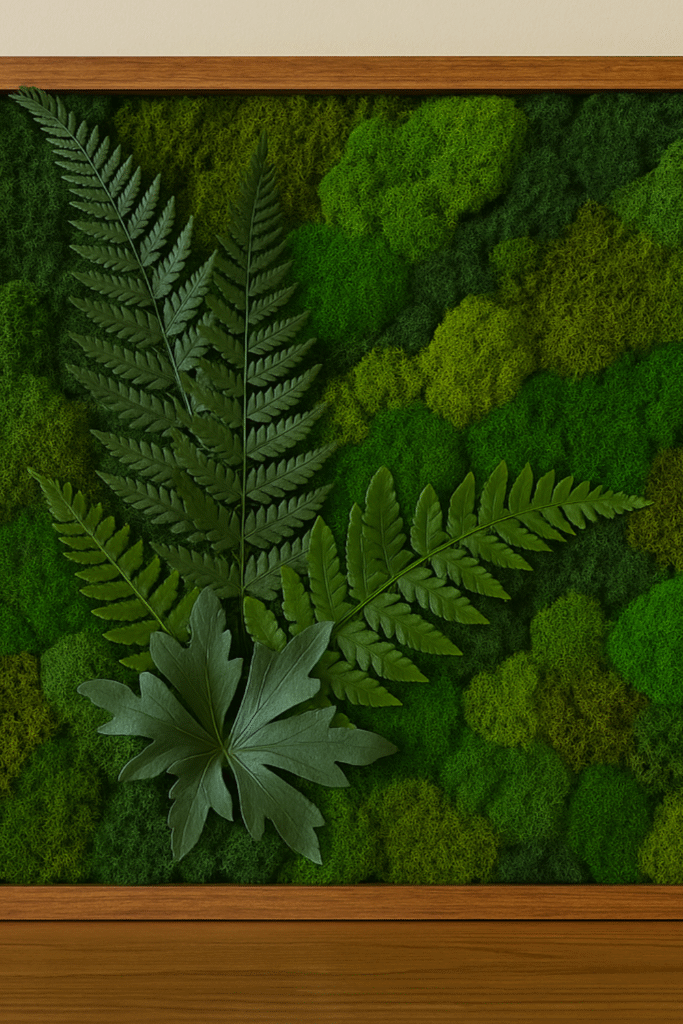
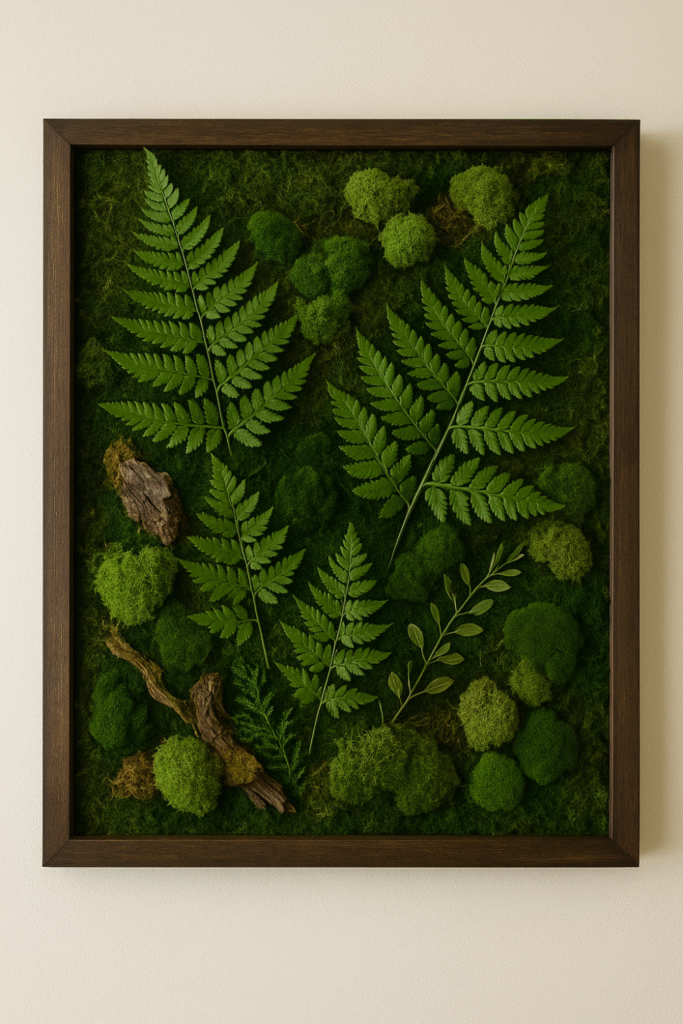
Bring a touch of the forest into your home with this stunning DIY Moss & Fern Wall Board—a living (or preserved) piece of art that transforms any room into a green sanctuary. Whether you want a statement piece for your gallery wall, an earthy backdrop for your office, or a calming accent in the bedroom, this botanical board blends art and nature in the most beautiful way.
No green thumb required—and yes, you can do this with preserved moss and faux ferns for a zero-maintenance option!
🌱 What You’ll Need
Here’s a list of recommended materials. Most can be found at your local craft store or on Amazon.
✂️ Materials:
- Wooden board or shadow box frame (choose size depending on your space)
👉 Search for: “Unfinished wood board” or “shadow box frame 16×20” - Preserved moss (sheet moss, reindeer moss, or cushion moss)
👉 Search for: “Natural preserved moss for crafts” - Faux or preserved ferns (different varieties add dimension)
👉 Search for: “Artificial ferns for wall decor” - Hot glue gun & glue sticks
👉 Search for: “Craft hot glue gun with precision tip” - Scissors or garden shears
- Optional: Dried branches, bark pieces, driftwood, or eucalyptus for texture
- Picture hangers or command strips (for mounting)
🧰 Step-by-Step Instructions
✅ Step 1: Choose Your Board & Prep Your Surface
Start with a smooth wood board, canvas panel, or shadow box. Choose something sturdy enough to hold heavier items like moss and faux greenery.
🖼️ Optional: Stain or paint the board a dark green, black, or wood tone to create a seamless backdrop.
✅ Step 2: Lay Out Your Design
Before gluing, arrange your moss and ferns on the board loosely. Create a visual flow—layer textures (soft moss, lacy fern leaves, wispy twigs) and work in organic clusters.
🎨 Design Tip: Keep it asymmetrical and natural, like a forest floor. Let ferns extend off the edges for a wild, organic look.
✅ Step 3: Glue Down the Moss Base
Using a hot glue gun, start with the largest pieces of moss. Cover the board as a base layer. Overlap slightly for fullness, and press each piece firmly to secure.
🧤 Tip: Use gloves if working with preserved moss—it can be crumbly and stain fingers.
✅ Step 4: Add Ferns & Accent Greenery
Next, glue in your ferns and foliage. Tuck stems into moss, letting some curve upward or out for dimension. Mix large fern fronds with smaller sprigs and other greens (like eucalyptus or rosemary sprigs) for interest.
🌿 Idea: Use curled wood shavings, seed pods, or dried flowers for a woodland feel.
✅ Step 5: Fill In Gaps + Add Texture
Step back and identify bald spots or flat areas. Fill them with:
- Reindeer moss for soft puffs
- Bits of bark or driftwood
- Light green or brown moss for color contrast
🎨 Texture = natural beauty.
✅ Step 6: Secure & Mount
Let the glue cool and set fully (10–15 minutes), then turn over the board and attach hangers or command strips. Choose your wall and press to secure.
🛑 Tip: If using a shadow box, consider hanging it vertically or placing it on a shelf as a centerpiece.
🌿 Maintenance Tips
If you use preserved moss and faux plants, your wall board will require no watering or upkeep. Just give it a light dusting once a month.
If using real moss, you’ll need to mist it weekly and keep it in a humid space (like a bathroom with natural light).
🛒 Recommended Supplies
- Preserved Reindeer Moss 200g – Assorted Greens
- Artificial Fern Picks – 12-Pack Realistic Greenery
- Unfinished Wood Craft Board – 16×20
- Mini Hot Glue Gun + Sticks
- Rustic Dried Moss + Bark Bundle
- Command Picture Hanging Strips – Damage Free
🌟 Final Look: A Natural Statement Piece
When you step back and see your moss and fern board come to life, it’ll feel like a mini escape to the forest. Whether you make a small version for your office or go big for a bedroom feature wall, you’re bringing in grounding energy, lush texture, and handmade beauty.
Looking for more nature-inspired DIYs? Subscribe or browse Nest & Blooms for ideas that turn your space into a sanctuary.
Affiliate Disclaimer: This post may contain affiliate links. As an Amazon Associate, I may earn from qualifying purchases at no additional cost to you. Thank you for supporting DIY projects like this one!
Leave a Reply